Installing System Center 2016 Operations Manager – Part 1
A week ago Microsoft announced System Center 2016 products. Microsoft adds most of features of this systems. We will analyze the new features on another article. In this document I Show you how can install System Center 2016 Operations Manager on a Windows Server 2016. Also you can read Single-Server Deployment of Operations Manager 2016 on TechNet.
This article has 2 parts.
- Part 1 – Preparing environment
- Part 2 – Installing Operations Manager
Part 1 – Preparing Environment
- Environment
- Requirements and Prerequisites
- Scenarios
- Install prerequisites
Environment
| DC | |
| SCOM16 | Windows Server 2016System Center 2016
SQL Server 2016
|
Requirements and Prerequisites
Before install Operations Manager you should check the Firewall Exceptions for Operations Manager article on TechNet. You should also check the prerequisites and system requirements to install operations manager from here. But in summary, you can check the table below
Hardware
| Role | CPU (x64) | Memory | Disk space |
| Management Server | 4-Core 2,66 GHz CPU | 8 GB | 10 GB |
| Gateway Server | 4-Core 2.66 GHz CPU | 8 GB | 10 GB |
| Web Console server | 4-Core 2.66 GHz CPU | 8 GB | 10 GB |
| SQL Server Reporting Services server | 4-Core 2.66 GHz CPU | 8 GB | 10 GB |
This table is about minimum requirements. You should use “Operations Manager 2012 Sizing helper” tool to determine system requirements for your environment. This tool has not been updated while I wrote this article. But you can use 2012 tool for determine hardware requirements.
Server Operating System
| Component | Windows Server 2012 R2 Standard, Datacenter | Windows Server 2016 Standard, Datacenter | Windows Server Core 2016 |
| Management Server | * | * | * |
| Gateway Server | * | * | |
| Web Console | * | * | |
| ACS Collector | * | * | |
| Operations console | * | * |
Microsoft Monitoring Agent for Windows Platforms
| Windows Server 2016 |
| Windows Server 2016 Nano Server |
| Windows 10 |
| Windows 8 Enterprise |
| Windows 8 Pro |
| Windows Embedded POS Ready 2009 |
| Windows Embedded Standard 7 Service Pack 1 |
| Windows Server 2003 Service Pack 2 |
| Windows Server 2008 R2 |
| Windows Server 2008 Service Pack 2 |
| Windows Server 2012 |
| Windows XP Professional 64-Bit Edition (Itanium) |
| Windows XP Service Pack 2 |
| Windows XP Service Pack 3 |
When you want to install agent on a windows system, this computer has to have
| PowerShell 2.0 or PowerShell 3.0 and Net Framework 3.5 or later. |
Web Console requirements
Web console can be installed on IIS 7.5 or newer version. You should install IIS Console with the following components. I use PowerShell script to install all windows server features that required for Operations Manager.
| Feature |
| Static Content |
| Default Document |
| Directory Browsing |
| HTTP Errors |
| HTTP Logging |
| Request Monitor |
| Request Filtering |
| Static Content Compression |
| Web Server (IIS) Support |
| IIS 6 Metabase Compatibility |
| ASP.NET (both the 2.0 and 4.0 versions of ASP.NET are required.) |
| Windows Authentication |
| NET Framework 4.0 |
| NET Framework 4.5 |
Management Server
| PowerShell 2.0 or PowerShell 3.0 |
| NET Framework 4.0 or NET Framework 4.5 |
Console
| PowerShell 2.0 or PowerShell 3.0 |
| Microsoft Report Viewer 2015 runtime |
| Microsoft CLR Types for SQL Server 2014 |
Reporting Server
| Remote registry service must be enabled |
| Same as SQL Server requirements |
SQL Requirements
| Component | SQL Server 2014, SP2 Enterprise/Standard (x64) | SQL Server 2016 Enterprise/Standard (x64) |
| Operational Database | * | * |
| Data Warehouse Database | * | * |
| ACS Database | * | * |
| Reporting Server | * | * |
Accounts
| Account | Description | Special Rights |
| Management Server Action Account | All systems that monitored with operations manager execute a process called MonitoringHost.exe. this process used for getting information about servers. This process collects event log, performance, WMI data and executes scripts and batches. | Should be either Domain User or Local SystemMember of the local Users group
Member of the local Performance Monitor Users group
“Allow log on locally” permission (SetInteractiveLogonRight)
|
| System Center Configuration Service and System Center Data Access Service account | In setup screen we enter an account information and Operations Manager uses same account for these services. This account used to update information in the OperationsManager database. | Should be either Domain User or Local System,Must have local administrative rights on the root management server,
Local user account is not supported,
|
| Data warehouse write account | The Data Warehouse Write account is the account used to write data from the management server to the OperationsManagerDW database, and it reads data from the OperationsManager database. | Should be Domain User,Local System account is not supported,
Local user account is not supported,
|
| Data Reader account | Data reader account is used to deploy reports. | Should be Domain User,Local System account is not supported,
Local user account is not supported,
|
In-Place Upgrade
Operations Manager 2016 supports in-place upgrade from previous versions;
| Version | Update Rollup (Min) |
| System Center 2016 Technical Preview 5 | |
| System Center 2012 R2 | Update Rollup 9 |
Scenarios
Single-server deployment
Single server deployment scenario used when you want to test, management pack development or have a small environment. You can install all roles except Gateway server on a single server. All Windows, Unix/Linux agents and network devices report to the management server. All of audit collection forwarder agents send audit data to this management server. Management server also has database role with SQL Server. When you deploy single-server scenario you can monitor limited agent.
Distributed Deployment
Distributed deployment allows for distribution of features across multiple servers. Distributed deployment provides load sharing and fault tolerance options. You can install all roles separate servers. Also you have database high availability options with SQL Always-ON and Cluster.
Installing
High Steps
- Windows Server Feature and Role installation
- SQL Server installation options
- Change SQL Agent service startup state
- Installing Report Viewer Controls
- Installing Operations Manager 2016
Detailed Steps
Windows Server Feature and Role installation
You can install feature and role prerequisites either via Server manager or via PowerShell. My choice generally using PowerShell. I use PowerShell script to install all prerequisites quickly and correctly.
- Open a PowerShell screen with administrative privilege
- Replace “sources\sxs” folder address for your computer and copy/paste to PowerShell screen.Import-Module ServerManagerInstall-WindowsFeature -Name NET-Framework-Core -Source C:\sources\sxs -Restart:$false

 Add-WindowsFeature Web-Server, NET-HTTP-Activation, NET-WCF-HTTP-Activation45, Web-Mgmt-Console, Web-Net-Ext, Web-Net-Ext45, Web-Static-Content, Web-Default-Doc, Web-Dir-Browsing, Web-Http-Errors, Web-Http-Logging, Web-Request-Monitor, Web-Filtering, Web-Stat-Compression, Web-ISAPI-Ext, Web-ISAPI-Filter, Web-Metabase, Web-Asp-Net, Web-Windows-Auth, Windows-Identity-Foundation


SQL Server installation options
We need SQL Server with the following options;
- Database Engine Services with Full-Text Search option and Reporting Service with Native Option.

- SQL Collation must be SQL_Latin1_General_CP1_CI_AS.

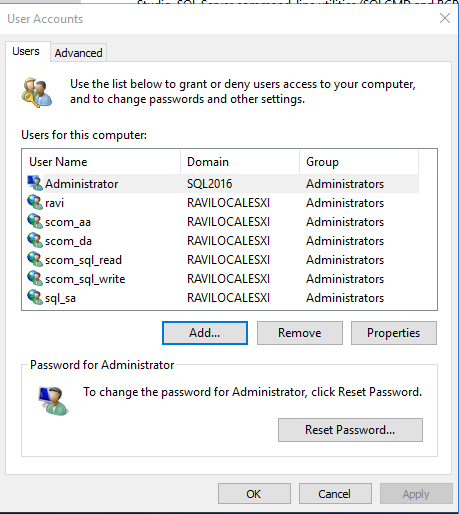
- Authentication mode is Windows. You have to add an account at least. I added my domain administrator account. You can create a special group, for example SCOMAdministrators named and add this group as a SQL Server Administrators.


- You can install management tools from Microsoft Download Center. Setup file is about 900MB. (SSMS-Setup-Enu.exe)
Change SQL Agent service startup state
- On the SQL Server open services.msc mmc console and find “SQL Server Agent (MSSQLSERVER)”

- Open properties with Double click.

- Change startup type from manual to automatic then click start to start service. Then click OK to close properties screen.

- You can close services.msc screen.
Installing Report Viewer Controls
Before starting to install Operations Manager, you must install report viewer controls. You should install this controls if you want to install Operations Manager Console. You can download setup file from Microsoft Download Center (https://download.microsoft.com/download/A/1/2/A129F694-233C-4C7C-860F-F73139CF2E01/ENU/x86/ReportViewer.msi)
- Double click to setup file,
- Click next,
- Accept eula and click next,

- Click Install button to install,

- Click finish button to close setup.


Installing System Center 2016 Operations Manager – Part 2
This article has 2 parts.
- Part 1 – Preparing environment
- Part 2 – Installing Operations Manager
Part 2 – Installing Operations Manager
- Accounts
- Setup
- Initial settings – Licensing
Accounts
When we install Operations Manager, we need 4 account. Action Account and SDK account can be Local System account. But Data warehouse read and write accounts must be domain user account. No account should be a local user. You must be local administrator of Windows Server and system administrator of SQL Server. Operations Manager does not require Domain Admins or equivalent rights to run. But some management packs require administrative privilege to monitor server software. You should read Management Pack guides.
Here is a table for accounts.
| Account | Description | Special Rights |
| Management Server Action Account | All systems that monitored with operations manager execute a process called MonitoringHost.exe. this process used for getting information about servers. This process collects event log, performance, WMI data and executes scripts and batches. | Should be either Domain User or Local SystemMember of the local Users group
Member of the local Performance Monitor Users group
“Allow log on locally” permission (SetInteractiveLogonRight)
|
| System Center Configuration Service and System Center Data Access Service account | In setup screen we enter an account information and Operations Manager uses same account for these services. This account used to update information in the OperationsManager database. | Should be either Domain User or Local System,Must have local administrative rights on the root management server,
Local user account is not supported,
|
| Data warehouse write account | The Data Warehouse Write account is the account used to write data from the management server to the OperationsManagerDW database, and it reads data from the OperationsManager database. | Should be Domain User,Local System account is not supported,
Local user account is not supported,
|
| Data Reader account | Data reader account is used to deploy reports. | Should be Domain User,Local System account is not supported,
Local user account is not supported,
|
Setup
- Logon to the server by using an account that has local administrative rights,
- Run setup.exe as administrator,
- In setup screen click “Install” to start wizard,

- In “select features to Install” screen, Select the roles you want to install. In this scenario we select all features. Noticed that, you can select Reporting Server feature only if SQL Reporting service is installed. Click next,

- In “select Installation location” screen you don’t have to change location. Click next,

- If complete installation of prerequisites in Part 1, In Prerequisites screen you see All prerequisites have passed. Click next,

- In “Specify an installation option” screen choose to “Create the First Management Server in a new Management Group” and then give a special name for your Management Group. I chose SCOMMG for management group name. when you install agent software on a Windows Server, you have to specify this management group name. Click next,

- Accept the EULA and then click Next,

- On the Configure the operational database screen specify SQL Server Name and instance. Our SQL installation is located same server with the management server. So, type SCOM16 to Server Name area. Click Next,

- On the Configure the data warehouse database screen specify SQL Server Name and instance. Our SQL installation is located same server with the management server. So, type SCOM16 to Server Name area. Click Next,

- SQL Server instance for reporting services screen click next. If you don’t select Reporting Services option on the feature selection screen, this screen will not be shown. Click Next,

- Do not change any option in “Specify a web site for use with the Web console” screen and click Next,

- Chose mixed authentication for Web console authentication mode then click Next,

- On the “configure operations manager accounts fill appropriate user accounts. Create these accounts on the domain controller as domain account. You can use the following table;
| Account | Domain\UserAccount | Privilege |
| Management Server Action Account | Domain\omaction | |
| System Center Configuration Service and System Center Data Access Service account | Domain\omsdk | Should be local administrator |
| Data warehouse write account | Domain\omwriter | |
| Data Reader account | Domain\omreader |

- On Diagnostic and usage data screen, click next,

- On Microsoft update screen click next,

- Installation summary screen click next,

- When installation finished close the setup window.


Initial Settings – Licensing
After operations manager installation you should do some settings. First we should enter product key to register our product. If you don’t enter license you can use Operations Manager about 180 days, then the trial period ends. Get your product key from Volume Licensing Site.
- Logon to operations manager server with local administrative rights and operations manager admin rights.
- Click start menu and find “operations manager shell”. Then click to open Shell screen.

- Type following command to enter your product key. Change X’s with your product key. You must use elevated permissions to use Set-SCOMLicense cmdlet.Set-SCOMLicense -ProductId XXXXX-XXXXX-XXXXX-XXXXX-XXXXX

- Type “Y” t confirm license then restart your server to make sure that these changes are applied correctly
- You can check license with this command.Get-SCOMManagementGroup | ft SkuForLicense, Version, TimeOfExpiration
| SkuForLicense | Version | TimeOfExpiration |
| Retail | 7.2.11719.0 | 12/31/9999 11:59:59 PM |