The KB article describing the fixes, changes, and instructions:
http://support.microsoft.com/kb/2449679
Get it from the download Center:
http://www.microsoft.com/downloads/details.aspx?FamilyID=39a871e0-d996-4568-be5d-2edb6f539330
List of all OpsMgr R2 Cumulative Updates:
http://support.microsoft.com/kb/2453149
***Caution: There is a known
issue documented in the KB article where applying this CU4 on existing OpsMgr
agents can cause an unexpected restart of several non-OpsMgr services. This is
caused by the Server 2008 Windows Installer RestartManager trying to suppress a
reboot as we attempt to update a locked file. This can potentially cause
application outages as the services for other Microsoft core OS components and
some 3rd party application services might be restarted. This only affects
agents running Windows 2008 and Windows 2008 R2. For this reason, you might
consider skipping this update and waiting for CU5. Or, consider applying this
update ONLY to your OpsMgr server roles, and rejecting any agent updates until
the next CU. Here is the actual text from the KB:
- Restart of non-Operations Manager services In certain cases, non-Operations Manager services may be restarted when the
Operations Manager agent is updated. This issue only affects computers that are
running Windows Server 2008 or Windows Server 2008 R2. We recommend that you
update agents at a time when a service restart or a server restart is
acceptable. Or, only update agents that are experiencing one or more of the
agent-related issues that are mentioned in the list of resolved issues. This
issue will be addressed in an upcoming cumulative update.
Make sure you see the other known issues and troubleshooting section both in
the KB and below at the bottom of this article.
The release notes in the KB article above cover the fixes that are included. I have seen these issues manifested in the field, so I do recommend this update. Of course, you should evaluate the fixes provided in ANY update and decide if you are impacted and if it makes sense for you to apply. The most common issue I have seen is where the RMS does not recover after the SQL server hosting the OpsDB or DWDB is rebooted. Also - ESPECIALLY if you are considering migrating to SQL 2008R2, this update will be required. If you are on R2-RTM, or R2-CU1, or R2-CU2, this update is likely worth the effort. I have added it to my Recommended Hotfix page.
Here are the high level fixes:
• Feature addition: SQL 2008 R2 Database Upgrade Support.
• Feature Addition: Health Service automatic recovers added for SQL Server Failure (Not enabled by default. See details below for how to enable)
• PRO Tips did not function correctly after CU3 was installed
• Alert View not working correctly when alert source contains both monitors and rules
• Event description is not being collected by Azure MP. In order for the event description to be collected properly, the Windows Azure application needs to be build using Windows Azure SDK 1.3
• MonitoringHost stops responding in some cases for agents running on Windows Server 2003 SP2
• Diagram View performance is slow when a user role is scoped to many groups
• Hyperlinks in Knowledge tab of alert properties are not active in web console
Let’s Roll:
So – first – I download it. The hotfix is about 1.26GB in size. Yes, gigabytes.
Now – before your heart rate starts rising…. understand… this update is the second CU which combines the Cross Plat CU with the OpsMgr CU. (CU3 did this as well) Aligning these is a very good thing – but it ends up increasing the size of the initial download. No worries though – I will demonstrate later how to only have to copy specific files to lessen the impact of distributing this update to all your management servers and gateways, if copying a 1.26GB file around is a problem for you.
Next step – READ the documentation… understand all the steps required, and formulate the plan.
I build my deployment plan based on the release notes in the KB article. My high level plan looks something like this:
1.Backup the Operations and Warehouse databases, and all unsealed MP’s.
2.Apply the hotfix to the RMS
3.Run the SQL script(s) update against the OpsDB AND Warehouse DB.
4.Import the updated management packs provided.
5.Apply the hotfix to all secondary Management Servers.
6.Apply the hotfix to my Gateway Servers.
7.Apply the hotfix to my agents by approving them from pending
8.Apply the hotfix my dedicated consoles (Terminal servers, desktop machines, etc…)
9.Apply the hotfix to my Web Console server
10.Apply the hotfix to my Audit collection servers
11.Update manually installed agents…. well, manually.
Ok – looks like 11 easy steps. This order is not set in stone – it is a recommendation based on logical order, from the release notes. For instance – if you wanted to update ALL your infrastructure before touching any agent updates – that probably makes more sense and would be fine.
****Requirement – as a required practice for a major update/hotfix, you should log on to your OpsMgr role servers using a domain user account that meets the following requirements:
•OpsMgr administrator role
•Member of the Local Administrators group on all OpsMgr role servers (RMS, MS, GW, Reporting)
•SA (SysAdmin) privileges on the SQL server instances hosting the Operations DB and the Warehouse DB.
These rights (especially the user account having SA priv on the DB instances) are often overlooked. These are the same rights required to install OpsMgr, and must be granted to apply major hotfixes and upgrades (like RTM>SP1, SP1>R2, etc…) Most of the time the issue I run into is that the OpsMgr admin logs on with his account which is an OpsMgr Administrator role on the OpsMgr servers, but his DBA’s do not allow him to have SA priv over the DB instances. This must be granted temporarily to his user account while performing the updates, then can be removed, just like for the initial installation of OpsMgr as documented HERE. At NO time do your service accounts for MSAA or SDK need SA (SysAdmin) priv to the DB instances…. unless you decide to log in as those accounts to perform an update (which I do not recommend).
Ok, Lets get started.
1. Backups. I run a fresh backup on my OpsDB and Warehouse DB’s – just in case something goes really wrong. Since I haven’t grabbed my RMS encryption key in a long while – I go ahead and make a backup of that too, just to make sure I have it somewhere.
I also will take a backup of all my unsealed MP’s. You can do the backup in PowerShell, here is an example which will backup all unsealed MP’s to a folder C:\mpbackup:
Get-ManagementPack where {$_.Sealed -eq $false} export-managementpack -path C:\MPBackup
We need to do this just in case we require restoring the environment for any reason.
2. Apply the hotfix to the RMS.
Tip #1: Here is a tip that I have seen increase the success rate: Reboot your RMS/RMS nodes before starting the update. This will free up any locked processes or WMI processes that are no longer working, and reduce the chances of a timeout for a service stopping, file getting updated, etc.
Tip #2: If you are running any SDK based connectors – it is a good idea to stop these first. Things like a Remedy product connector service, Alert Update Connector, Exchange Correlation Engine, etc… This will keep them from throwing errors like crazy when setup bounces the SDK service.
Tip #3: If you are low on disk space, and you have previously installed prior R2-CU’s, you can uninstall those and make sure they are removed from \Program Files (x86)\System Center 2007 R2 Hotfix Utility\ directory. This can free up a substantial amount of disk space, and once applied these files are no longer necessary.
****Note: If applying this update to a RMS cluster – FIRST see: How to apply a SCOM hotfix to a clustered RMS
****Note: Many people struggle with OpsMgr hotfixes – for failing to follow instructions. When applying an OpsMgr hotfix – you need to copy the downloaded MSI file (such as SystemCenterOperationsManager2007-R2CU4-KB2449679-X86-X64-IA64-ENU.MSI) to EACH and EVERY Management server and Gateway. You need to INSTALL this hotfix installer utility to EACH Management Server and Gateway. Don’t try and just copy the update MSP files. This wont work and you will fail to update some components. Common complaints are that the agents never go into pending actions, or the agent update files never get copied over to the \AgentManagement folders. In almost ALL cases, people were taking a shortcut and making assumptions. Don’t. Copy the 1.26GB file to each machine, then install the hotfix utility, then run the hotfix from the splash screen that comes up, immediately after installing the downloaded MSI. The only acceptable alternative to this process – is to install/extract the 1.26GB MSI to a workstation, and then build a command line based package as described below. For memory limited test environments – the command line method is the way to go.
Since my RMS is running Server 2008 – I need to open an elevated command prompt to install any SCOM hotfixes. That is just how it is. So I launch that – and call the MSI I downloaded (SystemCenterOperationsManager2007-R2CU4-KB2449679-X86-X64-IA64-ENU.MSI). This will install the Hotfix Utility to the default location.
Tip: (This part may take a LONG TIME to complete if calling the 1.26GB file on a system will limited memory resources. This is because it must consume 1.26GB of RAM to open the file, temporarily. For production systems meeting the minimum supported 4GB, this probably wont be as much of an issue. For virtualized labs and test environments where you are running very limited memory, (1-2GB RAM) you will see this process take a considerable amount of time. On my 1GB memory virtualized management servers, it would not install at all. I upped them to 2GB and they took about 10-20 minutes to open and run the setup program. See section at the end of this article **Command line install** for ideas on how to mitigate this issue if affected)
Eventually – a splash screen comes up:

I choose Run Server Update, and rock and roll. You MUST execute the update from this “Run Server Update” UI. NO OTHER METHOD will work.
It runs through with success, I click finish – then another setup kicks off. This is by design. There should be three actual setups running consecutively (once for the core update, one for the localization, and one for Xplat.)
You could see this potentially three times:

After clicking finish on the 3rd one, I was prompted with this:

So – you should plan for a reboot. Hit OK. (it wont reboot automatically)
Then wait around 30 seconds for any post install processes to complete, and then click “Exit” on the splash screen.

If you have trouble at with this stage – get some error messages, or if the installation rolls back – see the troubleshooting and known issues at the KB article and below in this post. There are two known and fairly common issues encountered with simple resolutions.
If you are patching a clustered RMS – you can continue the process using the link posted above – and complete the second node.
Now – it is time to validate the update applied correctly. I can see the following files got updated on the RMS in the standard install path: \Program Files\System Center Operations Manager 2007\

**note – this isn't all the files included in the hotfix package, just a spot check to make sure they are getting updated.
Next I check my \AgentManagement folder. This is the folder that any agents will get updates from. I check the \x86, \AMD64, and \ia64 directories:
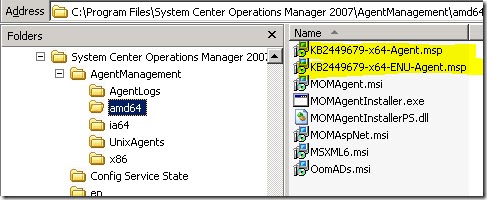
It is good – that our KB2449679 CU4 agent MSI’s got copied over. In this CU4, we did remove the previous CU files if they existed.
***NOTE – it is CRITICAL to perform the next step in this order. The SQL scripts MUST be deployed at this time, immediately after installing the update on the RMS. If you don’t, your alert views could be empty. You could see multiple events on the RMS about errors from the SDK (26319) and DataAccessLayer (33333). The RMS will not generate new config until these scripts are executed. Your consoles might also show the following, until you run the SQL scripts:

3. Time to run the SQL scripts. There are 2 scripts, located on the RMS, in the \Program Files (x86)\System Center 2007 R2 Hotfix Utility\KB2449679\SQLUpdate folder:
•CU4_Database.sql
•CU4_DataWarehouse.sql
Let’s start with CU4_Database.sql
I simply need to open this file with SQL management studio – or edit it with notepad – copy the contents – and paste it in a query window that is connected to my Operations (OperationsManager) Database. I paste the contents of the file in my query window, it takes about a minute to complete in my lab. It will return a single string of output stating MPLastModified with a timestamp, upon success.
Next up – we now need to connect to the Warehouse database instance, and open a new query window against the OperationsManagerDW database. We will execute CU4_DataWarehouse.sql which will return “Command(s) completed successfully”.
DO NOT skip step number 3 above, and do not continue on until this is completed.
4. Next up – import the MP updates. That's easy enough. They are located at \Program Files (x86)\System Center 2007 R2 Hotfix Utility\KB2449679\ManagementPacks\ and are named:
•Microsoft.SystemCenter.DataWarehouse.Report.Library
•Microsoft.SystemCenter.WebApplication.Library.mp
•Microsoft.SystemCenter.WSManagement.Library.mp
These will upgrade existing MP’s in your environment. They take a few minutes each to import.
At this point – if you are using cross platform monitoring for Unix agents – you would upgrade the Xplat MP’s via a separate download. See the KB article for steps on this, and potentially upgrading your Unix agents if required.
5. Time to apply the hotfix to my management servers. I have 3 secondary MS servers, one is Windows 2008 and the other two are older, they are running Windows 2003. So on the 2008 server I open an elevated command prompt to apply the hotfix utility MSI, and just run it directly on the older servers.
Again – I MUST RUN SystemCenterOperationsManager2007-R2CU4-KB2449679-X86-X64-IA64-ENU.MSI on each Management server. This installs the hotfix utility, which will then launch the splash screen.
Tip: (This part may take a LONG TIME to complete if calling the 1.2GB file on a system will limited memory resources. This is because it must consume 1.2GB of RAM to open the file, temporarily. For production systems meeting the minimum supported 4GB, this probably wont be much of an issue. For virtualized labs and test environments where you are running very limited memory, you will see this process take a considerable amount of time. On my 1GB memory virtualized management servers, it would not install. I upped them to 2GB and they took about 10-20 minutes to open and run the setup program. See section at the end of this article **Command line install** for ideas on how to mitigate this issue if affected)
Once the splash screen comes up I “Run Server Update” These all install without issue (again – three setups run consecutively). I spot check the \AgentManagement directories and the DLL versions, and all look great. REMEMBER – you can sure patch all your management servers at the same time, however, your agents WILL fail over during this time because we stop the MS HealthService during the update. Keep this in mind. It is best to update management servers one at a time, synchronously, to keep your agents from failing over to the RMS and overloading it, or causing massive Heartbeat failures because they have nowhere to report to.
Note: You might see a “Restart Required” pop up after the last setup routine is complete. Just ignore this for now and hit OK, and then we will need to reboot this server when we are finished.
6. Next up – any Gateway machines here. Since my gateways all have limited memory, I don’t want to run the full 1.2GB MSI. I am running these from a command line which uses a LOT less resources. I build a local install package in my local C:\temp\ directory from my article at this LINK using the following command line modified for CU4:
SetupUpdateOM.exe /x86msp:KB2449679-x86.msp /amd64msp:KB2449679-x64.msp /ia64msp:KB2449679-ia64.msp /x86locmsp:KB2449679-x86-ENU.msp /amd64locmsp:KB2449679-x64-ENU.msp /ia64locmsp:KB2449679-ia64-ENU.msp /Agent /noreboot
I “Run Gateway Update” from the splash screen, and setup kicks off. It runs three separate installs and I see the following – 3 times:

Remember to spot check your DLL versions and \AgentManagement directories. They both should be updated.
7. I check my Pending Management view in the Administration pane of the console – and sure enough – all the agents that are set to “Remotely Manageable = Yes” in the console show up here pending an agent update. I approve all my agents (generally we recommend to patch no more than 200 agents at any given time.)
After the agents update – I need to do a quick spot check to see that they are patched and good – so I use the “Patchlist” column in the HealthService state view to see that. For creating a “Patchlist” view – see LINK
Out of a total of 41 total agents in my lab – 40 of them patched perfectly. Only one did not fully patch – it is my Windows 2000 server. It is possible this older OS still has issues with requiring a reboot between the first update and the ENU localization update MSI.

The CU4 actually REPLACES any previous patches applied in the PatchList table – this is NICE. Looks good. (Note) I will have to formulate a plan to go and update my manually installed agents (Remotely Manageable = No)
Note: See the KB article if your agents will not update. If you previously applied CU3, or if your agents require a reboot from a previous windows installer package – you cannot update them until they receive a reboot. Normally an agent side reboot is not required for updating an agent. It will only be required if it falls into one of these two specialized situations.
8. I have a few dedicated consoles which need updating. One is a desktop machine and the other is my terminal server which multiple people use to connect to the management group. So – I kick off the installer – and just choose “Run Server Update” as well. I do a spot check of the DLL files – and see the following was updated on the terminal server:

9. Next up – Web Consoles. I actually have two – and both are running on management servers, which I have already patched. So – I will simply just go check their DLL files to ensure they got updated:
From: \Program Files\System Center Operations Manager 2007\Web Console\bin

10. I don't have ACS set up at the moment – but at this point if I did – I would go hit those Management servers that have already been patched – but this time run the update and choose to “Run ACS Server Update”

11. Manually installed agents. I have a fair bit of these… so I will do this manually, or set up a SCCM package to deploy them. Most of the time you will have manually installed agents on servers behind firewalls, or when you use AD integration for agent assignment, or when you installed manually on DC’s, or as a troubleshooting step.
Now – the update is complete.
The next step is to implement your test plan steps. You should build a test plan for any time you make a change to your OpsMgr environment. This might include scanning the event logs on the RMS and all MS for critical and warning events… looking for anything new, or serious. Testing reporting is working, check the database for any unreasonable growth, run queries to see if anything looks bad from a most common alerts, events, perf, state perspective. Run a perfmon – and ensure your baselines are steady – and nothing is different on the database, or RMS. If you utilize any product connectors – make sure they are functioning.
The implementation of a solid test plan is very important to change management. Please don't overlook this step.
*** Command line install option
In some situations, you might want to perform a command line installation of the update on your RMS/management server. Most of the time – I don’t recommend this, because you generally need the feedback if each part was successful or not. However, there are situations where it is required.
One example is for users who have issues with the 1.2GB MSI file, and getting the hotfix installer running, especially on limited memory systems. For those, you can use a command line options which removes the issue.
The KB article has a section which documents how to set up the arguments correctly. I used a variation of that, because I did NOT want /silent to be used… as I want to visibly see the feedback and interact with the installation. Here is the command line I ran, for an US/English installation:
SetupUpdateOM.exe /x86msp:KB2449679-x86.msp /amd64msp:KB2449679-x64.msp /ia64msp:KB2449679-ia64.msp /x86locmsp:KB2449679-x86-ENU.msp /amd64locmsp:KB2449679-x64-ENU.msp /ia64locmsp:KB2449679-ia64-ENU.msp /Agent /noreboot
In order for this to work – you need to INSTALL the hotfix utility somewhere, then copy the ENTIRE FOLDER STRUCTURE starting with the \KB2449679 folder and all files and folders below it. Here is an example copied to C:\temp\ directory:

Just remember – you cannot run just specific MSP files in these folders individually, there are post install processes that must be run, and should be called by the SetupUpdateOM.exe. You also cannot just run SetupUpdateOM.exe by double-clicking it, or the post install processes wont run. Use the default method of installing the original downloaded MSI file, OR use this command line option.
For additional command line options, including how to make a CU package smaller, and how to patch consoles, agents, etc…. see the following post:
http://skaraaslan.blogspot.com/2011/02/command-line-and-software-distribution.html
Known issues/Troubleshooting:
1. CU4 fails to apply. The SDK or config service may not start after this, and CU4 fails on subsequent retries. The installation rolls back and you get a dialog box that the setup was interrupted before completion. There are two possible issues, with workarounds to this. One is caused by a general timeout, the other is a .NET 2.0 Issue due to a CRL response delay. Start with workaround “#1” and if that fails, try workaround “#2”. #2 is a fairly rare condition.
Workaround #1:
The services are timing out while trying to start. Using http://support.microsoft.com/kb/922918 set the ServicesPipeTimeout entry for all services to have 3 minutes (180000 milliseconds) and REBOOT the server. Then try and apply CU4. It should apply. You likely will see a few warning messages about failure to start the OMCFG service – just click ok and the setup will continue.
Workaround #2:
Using Follow the steps that are outlined in Microsoft Knowledge Base article KB936707
***Note: This hotfix likely will not be required. The hotfix is ONLY required if you are still running .NET 2.0 RTM. This hotfix is included in .NET 2.0SP1 and later. The hotfix does not resolve the issue, simply put – the hotfix (or .NET 2.0SP1 or later) simply ENABLES the use of a new tag in XML which will allow for disabling of CRL checking. If your RMS is on Windows Server 2008 or 2008R2 – you already have this hotfix included.
***Note: Once you have verified you have .NET 2.0 SP1 or later installed – you MUST perform the second step – which involves editing 2 application.exe.config files. The KB article is misleading in that it tells you to add this information as an entire section – which is incorrect – you must find the
The manifest files are located on the RMS at the \Program Files\System Center Operations Manager 2007\ root directory. The manifest files will need to be edited for the config and sdk service on affected RMS. The file names are:
•Microsoft.Mom.Sdk.ServiceHost.exe.config
•Microsoft.Mom.ConfigServiceHost.exe.config
In between the EXISTING
This solution disables CRL checking for the specified execute-ables, permanently.
2. Agent patchlist information incomplete. The agent Patchlist is showing parts of CU4, or CU4 but also CU3, CU2 or CU1 or nothing. The CU4 localization ENU update is not showing in patchlist. This appears to be related to the agents needing a reboot required by Windows Installer from a previous installation package. Once they are rebooted, and a repair initiated, the patchlist column looks correct with the CU4 and CU4 ENU (localized) information. The correct and complete patchlist information will appear as below:
System Center Operations Manager 2007 R2 Cumulative Update 4 (KB2449679); System Center Operations Manager 2007 R2 Cumulative Update 4 (KB2449679) - ENU Components;
Kaynak : Kevin Holman
Hiç yorum yok:
Yorum Gönder